mutteringhousewife

What does the last of the housewives do?

Category: Confectionary

Sweet Georgiou’s

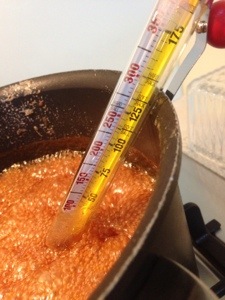
No, really, I had to go there for work. I’m giving a lecture next week and solids and liquids will feature a fair bit. Kool Mints actually make a fairly good analogue of particles crystallizing.

20140408-175059.jpg
The amount you get in the standard sized packet of Kool Mints (which I swear has decreased markedly) isn’t enough to crystallize in a glass casserole dish. So I could buy a few packets. Or I could go to Georgiou’s.

You want to do lolly bags for an entire kindergarten class, you have twelve grandchildren you want to organise an Easter Egg hunt for, you want to give your conference attendees something to do with their hands other than tweet about how bored they are, you have to come to Georgiou’s. It’s a little unassuming from the streetfront, on New Canterbury Road in Petersham.

20140408-175942.jpg
Walk in and if you breathe in too deeply you’ll get sugar diabetes, as my grandma calls it. As you walk in on the right is the American “food” that you’ve seen on TV, Junior Mints, JuJy Fruits, all the M&M flavours, those large boxes of confectionary masquerading as breakfast cereal.

20140408-180359.jpg
And Clamato is real! I thought Homer Simpson made it up!

20140408-180600.jpg
Described as a tomato cocktail, the description proudly announces it contains the equivalent of two pounds of shrimp and clams. The website suggests that it’s excellent mixed with beer. And have a Captain Cook at the item on the right of this shot

20140408-180959.jpg
I originally took it because of the hot sauce of death, which I wouldn’t have thought was a selling point, and only noticed the caffeine laced maple syrup after. Crikey.

Anyway, the main part of the warehouse is bulk lollies and chocolates. You can get small packets;

20140408-181328.jpg
Or big ones;

20140408-181358.jpg
They had a whole aisle of cellophane and wicker bulking up Easter packs. But you could get cheap packs of deceased chocolate bunnies in pieces. Not sure what you’d do with that. Spread it on the garden, perhaps.

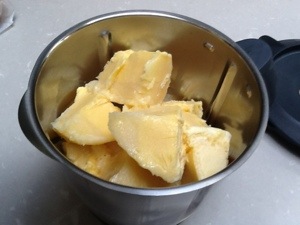
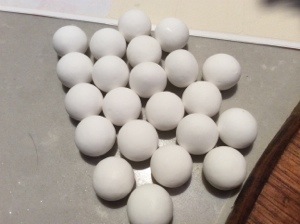
I had to go around the whole place four or five times to make sure I hadn’t missed anything. I was a little sad not to see those Austrian rectangular fruit sweets wrapped in waxed paper, Cinnamon Mentos or Callebaut cooking chocolate, but you can’t have everything, and anyway I just would have bought them and eaten them. I got my kilo pack of Kool Mints, some mint sticks that should do for a liquid crystal demonstration, some Mint Imperials because I like them and can’t make them, some non-caffeinated maple syrup because we’re having a maple syrup moment in our house and some Belcolade cooking chocolate because supplies are low. I didn’t want this much, and I don’t know the brand, and considering the dust, nobody else does either.

20140408-182153.jpg
Now all I have to do is finish writing my lecture and not eat the Kool Mints before the end of next week. I wonder if they’d be tax deductible?

Advertisement

Strawberry Meringues

I was put off attempting meringues after being kitchen hand to a friend as she made macarons. Man those things are fiddly. Age this, dry that, grind this up, measure the temperature of the other. Make a ganache. Write an anxious email to Adriano Zumbo about your feet. Where I was making my error was in assuming meringues are similar. They aren’t. Do you want the Women’s Weekly fail safe meringue recipe? Of course you do.

It really is just dump all the ingredients in the KitchenAid and let the whisk do its thing. No messing about with the thoroughly clean bowl or the order of ingredients. I’ve made them a few times now to much acclaim. Today, to the annoyance of my family, I decided to mess with them.

I blame ooh aah cooking. She put up a link to instructions for making strawberry dust. You’ll appreciate that the problem with adding flavours to many recipes is the fact that the flavours have to be relatively dry, otherwise they muck up the consistency. But if you can dry out strawberry! Or any other berry, or mango or pineapple or any of those flavoursome but damp fruits! Look out friand recipe. Here’s what you do.

You blend up half a kilo of strawberries. Or however much you have on hand. You spread the pulp over a couple of baking paper lined trays, thus.

20131001-122944.jpg
You put them in the oven for many hours. The oven temperature should be below 100 degrees, just high enough for water vapour to be condensing on the glass of the oven door. Fifty degrees wasn’t high enough on my oven, I had to go to about seventy. What you end up with is this.

20131001-123137.jpg
It’s quite dry and feels disturbingly like skin. I didn’t want to dry it out further in case it burned.

20131001-123235.jpg
You let that cool and ignore your husband’s passing comment that it may be time to request some more hours at work. Blend it up in the blending device you happen to have to hand. It doesn’t quite go to dust.

20131001-123352.jpg
Now make your fail safe meringue. Place in the KitchenAid bowl the whites of two eggs, one and a half cups of caster sugar, four tablespoons of boiling water, a teaspoon of cornflour, a teaspoon of white vinegar and half a teaspoon of vanilla essence. Whisk for quite some minutes, you can leave it whisking until it gets really solid.

20131001-123554.jpg
At this point I added in a quarter of a cup of the strawberry not quite powder and whisked that in. Pop heaped teaspoons of the stuff on baking paper lined trays, or you could go all fancy and pipe them, they hold their shape well. Bake at 180 degrees for ten minutes, then drop the oven to about 120 degrees and let it go for another fifty minutes.

20131001-123801.jpg
See, it has zingy little flecks of strawberry through it. I think they’re delicious. The Horror wants me to go back to plain ones , but he’ll help me out by eating these ones. I still have some strawberry particles left, but I have to go to work now. Additional strawberry awesomeness will have to wait.

Toffee with Gas

You’re getting a peek today into one of my tutorials.  I’m teaching fledgling primary school teachers how to teach science and every week we do some hands on activities around one topic.  This week we’re playing with air, and there was an activity planned which involved gelatin and a blender and various other things to make something edible with air whipped into it.  Well, you know how it is with blenders.  These were cheap and nasty ones and burned out on Monday.  We can’t have the students not knowing anything at all about air in food.  So I’m going to tell them about one of my favourite combinations, air and sugar.

But first!  Just the sugar.  For a control I need to make this food without the air.  When you heat up sugar dissolved in water quite a lot and then cool it quickly, what do you get?  Does anyone know?  That’s right, toffee, a gold star for you.  Just doing it with white sugar is a little dull, so here’s the recipe I’m using today.

Place in a large saucepan three quarters of a cup of white sugar, two tablespoons of honey, two tablespoons of golden syrup and two tablespoons of water.

023_1

Generally a toffee mix will have more water in it, but bear with me.  Heat it gently while stirring until the sugar dissolves.

029_1


Not too gently, you don’t want to be there all day.  You let that bubble away without stirring it until it gets to about 150 degrees Celsius.  You determine what the temperature is with a candy thermometer.

030_1


If you have a dodgy thermometer like I do that appears to have got water in it and is unreadable, or just don’t have one, you want to test the mix periodically for consistency.  You do this by dropping a bit of it onto a saucer of cold water.

025_1


Those little blobs will go from stuff you can swirl around, to blobs that retain their shape, to blobs that are fairly firm but can be squished, to hard crunchy little blobs.  Those last two steps can be quite close together.  Get that stuff off the heat and pour it onto a baking tray lined with baking paper.

026_1

Pretty soon it will harden and you can snap it into bite sized tooth gluing pieces.

028_2


We could go into the chemistry of what’s going on here, and it’s a lot more complicated than you’d think.  I’ll restrain myself and just mention that the sugar hasn’t really melted, kind of, because it’s thought that sugar doesn’t actually melt, it decomposes into a whole lot of other compounds, some of which melt at this temperature and some of which don’t, and it’s still kind of in solution with a tiny bit of water.  Dumping it onto a cold tray not only recrystallises the sugar and the breakdown compounds, but by doing it fast you’ve also turned it into a glass.  Don’t get me started.

So how do we add air to toffee?  I’m glad you asked.  Bicarbonate of soda.

Make the toffee as before.  But just at that point where you’re taking it off the heat, chuck in a teaspoon and a half of bicarbonate of soda.  You’d kind of expect that a bit of bicarb into this super hot boiling mess would pretty much explode.  But it doesn’t, because what it would like to react with is water, and there’s only a tiny bit in there.  Mix it fast with a wooden spoon, you want those carbon dioxide bubbles distributed throughout the whole lot before it starts solidifying.  Dump it, as before, onto a lined baking tray.

031_2


Honeycomb.  You’ve made honeycomb.  It has little to no resemblance to that waxy stuff you find in a beehive, but we’ll let that go too.  This will also set pretty fast, when it’s cool you can snap it into pieces.  Now taste some of the toffee and some of the honeycomb.  The honeycomb will give you a bit of a buzz on your tongue from unreacted bicarb, but ignoring that, aren’t they completely different eating experiences?  And the difference is air.  You lucky lucky tutorial class, you actually get to try some.  Aren’t you glad the blenders burned out?


Art of the Lolly Bag

I blame myself. I’ve passed on the sweet tooth gene combination to the Horror. Traditionally it has come through the female line, from my Nanna, who had packets of Pascalls Columbines stuffed down the back of all the lounges and into all her cardie pockets. To my mother, who made everything out of a packet, including mashed potato. But not toffee. That she made from scratch. Then there’s me, who’s been known to eat strawberry jam for dinner when not under adult supervision. And no we have the Horror, who uses a Lego head designed for storing different sized Lego pieces for storing his lolly stash, sorted into chocolate, wrapped, unwrapped and lollipops. I’m surprised he has any teeth at all. You can imagine he’s very particular about the lolly bag used for ejecting kids from his birthday party.

The institution that hosted his birthday party does actually provide lolly bags. They are pretty substandard, containing a no name lollipop, a facsimile packet of not Nerds, a strip of something acidic and chewy and various bits of plastic. Between us, the Horror and I have come up with something far more excellent. It has taken a few years of refining, but I think we have it about perfect.

For a start, birthday party attendees have no interest in the bag. Use a paper bag, seal it with packing tape. Actually, for girls you may want to use a horsie sticker, they pay slightly more attention. Next, brand name lollies. I’ve tried and tested, and it does make a difference. Now for the mix.

Variety is what it’s all about. I like to include a lollipop (ChupaChup), some chocolate (a Milky Bar cowboy, or a Dairy Milk tiny bar), some wrapped chewies (mini Mentos and a couple of Natural chews), some soft sweets (coca cola bottles, marshmallows, sometimes lolly bananas), some hard (lemon sherbets). Of late I’ve also been putting in two or three Clinkers and this year two Pineapple Lumps per bag made their debut. The crowning glory is the Wizz Fizz Sherbet Cone. If you haven’t tried them, get out and get yourself some, they’re a terrific sweet, chewy, crunchy, fizzy.

20130729-161750.jpg

Next is assembly. After much experimentation I’ve found that its best to get all the bags out, so you know where you’re at, and load them up two or three batches at a time. One at a time is too time consuming, the whole batch into one bag at a time is just confusing. So you grab, say, a lollipop, two marshmallows, a mini Mentos and three coca cola bottles and put those into each bag. Then move on to the sherbet cone, three Clinkers, two lemon sherbets and two Pineapple Lumps. And so on. And so forth. Just this year I’ve been able to trust the Horror to help me with it and that cut down production time considerably.

20130729-173540.jpg
Well, that’s birthday season over in our house, thank goodness. It’s very bad for the schoolgirl figure. Oh, except for one last party this coming weekend. I must get along to the gym.

Butterscotch

We’re driving to the snow on the weekend. Yes, yes, yes about the falling over, I’ll try not to. Like I mean to. Anyway, it’s a bit of a drive and I have quite the knack for falling asleep while driving. It does mean that I have no problem getting to sleep at night, but a bit problematic on a long drive. So I suck on sweets for my bit, and avoid driving at afternoon tea time and after nine. My sweet of choice is Koolmints, but I thought I’d make my own this time.

Had a look at making humbugs, but that seems to involve third degree burns, so I had a go at butterscotch. Here’s the Women’s Weekly recipe.

20130704-175126.jpg
This cookbook was published just as Australia was going metric, so the back of the book has handy conversion tables to metric. A pound of sugar is 453.6 grams. Quarter of a pint of water is 142 millilitres. Who knows how much a dessert spoon is, I just used my breakfast spoon, and anyway the glucose is so viscous you’re never going to accurately measure it except by weight. And why are they mixing weight and volumes? Instead of half a cup of brown sugar, I used half brown sugar and half dark muscovado sugar. Partially because I like the rich treacly taste, partly because I’ve run out of brown sugar.

So you put all the ingredients in a saucepan, and bring it to the boil while stirring with your trusty wooden spoon. After the butter has melted and the sugar is dissolved, you turn up the heat and leave it alone. Well, you put the sweets thermometer in. That little eight dollar miracle takes all the fear and loathing out of sweet making. It’ll start bubbling up, adjust the heat so it doesn’t bubble right on out and all over your stovetop. But once you’ve got it bubbling about half way up the saucepan and the sweet thermometer measuring away, you can leave it alone.

20130704-182620.jpg
It took about half an hour to get up to that temperature, even with obsessively watching the temperature. You want it at 290F, I’m going Fahrenheit because that side of the thermometer is easier to read. As soon as it touches that temperature (hard crack if you’re doing it the old fashioned way), take it off the heat. With great foresight, you’ve put out a biscuit tray covered in baking paper. Slosh that boiling toffee all over it.

20130704-183407.jpg
It takes a surprisingly small amount of time to cool down, only as long as yet another irate phone call to a bathroom supply shop. Try to cut it up before it solidifies, and use your largest knife, you need leverage.

20130704-183645.jpg
If you don’t want it to all stick together you’ll need to wrap it which does sound like a pain in the neck. I just cut strips of baking paper and rolled them up, then packed them in small ziplock bags.

20130704-183826.jpg
Here’s the important step, hide them from the children. The leftovers went in seconds.

Extra Chocolatey Brownies. With Extra Chocolate

I was going to tell you an amusing story about my early morning encounter with a range of neighbourhood pets, but it was thirty six hours ago now and the immediacy is gone. It also reflects poorly on my housekeeping and anyway the swelling has started to subside. So instead I’ll be telling you about a new brownie recipe I tried on the weekend. It was very chocolatey.

There are so very many brownie recipes, not all of them very good, so once you have a tried and tested one that is fairly well received it’s hard to deviate from it. But I trust Tish Boyle, and I’d been waiting for a party or something to try her Double Chocolate Brownies out on because it looked so rich. This weekend there was such an event, there were two little nieces with birthdays this week, so a family gathering was called.

This is a walkover for the Thermomix, but if you don’t have one you could always mess about with double boilers and bowls and such. Melt together 150 grams of terrific chocolate (I’m using 70% Callebaut drops) with 180 grams of sweet butter. I’m not game yet to use my homemade butter on such a butter rich recipe, we’ll work our way up. I’ve used it in an oatmeal biscuit and it was completely acceptable. In the Thermomix you put the temperature on about 60 degrees and set it going for about four minutes on speed two. Or however long it takes to melt.

You then need to crack out your KitchenAid and slot in the whisk. If you’re doing the lot the Thermomix, scoop out the chocolate butter mix into a bowl, wash the jug and dry it. Stick in the butterfly. Beat together three eggs, a cup of caster sugar, a third of a cup of brown sugar and two teaspoons of vanilla extract. Beat it oh so very much, you won’t be doing this with a fork. After some minutes it will be thick and light coloured and will form a ribbon dripping from the whisk when you lift the KitchenAid head. Pour in the chocolate mixture. For me it sank straight to the bottom, meaning that mixing it gently with the paddle had little to no effect. Use a wooden spoon. Add a cup of white flour and fold that gently in. Stir in 180 grams of chocolate bits, you could use the same brand as you melted earlier or something lighter. Scrape the lot into a lined nine inch square cake pan.

In theory you could bake it at 160 degrees Celsius for almost an hour, or until the skewer test says that it’s done. In practise you could put up with the Horror from Outer Space hopping up and down beside you saying “shouldn’t we go now shouldn’t we go now shouldn’t we go now we’re going to be late shouldn’t we…” for as long as you can stand, in my case about half an hour – my stamina has built up over the years, take it out of the oven half cooked and finish baking it at your sister’s place.

The what I recommend you don’t do is haul it out of the pan and immediately attempt to cut it up so that people can start eating it. It isn’t interested. It will sag and crumble. That didn’t stop about a third of it being eaten before it cooled down. Cool it completely, and maybe even wait a day. Then it will look like this.

20130604-172941.jpg
It’s got a crunchy crust and a very rich and dense inside, but not wet or too fudgy. The high cocoa chocolate was perfect for this, it’s just gorgeous. You really could leave out the extra chocolate chips and bung in walnuts or nothing at all and it would still be a commanding presence in the brownie lexicon. However it’s no good for the schoolgirl figure at all. Perhaps if I ice my ankle some more I could go to the gym in the morning.

Nutella in the Thermomix

I foolishly asked the boys if the was anything they fancied that I could buy or make for them as I had a fairly free dance card today. After much discussion, they decided they’d like me to make a vanilla cupcake with caramel swirls that you could stick a sparkler in, light, then it would explode. I don’t know why they bothered deciding on a flavour. The German billet piped up from the back seat “Have you in Australia … Nutella?”

Well how did she know that was on my long list of things to try in the Thermomix? It’s actually horrifyingly easy, and almost as easy with a blender and a saucepan. First place ninety grams of sugar in the Thermomix and zap it into icing sugar. You can vary this with the sweetness of your chocolate. Then add one hundred grams each of chocolate pieces and hazelnuts.

20130506-225039.jpg
Did you know you can get skinned hazelnuts at the health food shop? Usually when a recipe suggests skinning the hazelnuts, I fetch a small sigh and decide to see how the recipe copes with skins. I don’t think you could do that to Nutella. I’m using 70% cocoa Callebaut chips, which I’m finding a little strong for some uses. This may be one of them, the finished product tastes like a limited edition extra dark Nutella. Jumping ahead of myself. The instructions suggest zapping it for ten seconds, which gives you a powdery substance.

20130506-225433.jpg
I taste it and while it’s undeniably delicious, it’s pretty gritty. I decide to zap it five more times for thirty seconds each time, scraping down the sides in between zaps. This turns the hazelnut into a butter rather than a powder.

20130506-225606.jpg
Add seventy grams of butter, one hundred grams of milk and fifty grams of cocoa. Cook at fifty degrees for six minutes on speed three (this is the bit you could do in a saucepan if you were using a blender). This gave me a very smooth, shiny mix, which I had to find a container to contain it with. That’s one problem with making everything from scratch, at some point you run out of recycled honey jars.

20130506-230214.jpg
After refrigerating it for a couple of hours it stiffened up, but was still easily spreadable. Lucky, because by then the Muffet and the German billet were home and were very pleased to be tasters.

20130506-230406.jpg
Not a health food, but I did use Callebaut chocolate, Callebaut cocoa powder, organic milk and organic butter. The hazelnuts weren’t organic, but they were from a health food shop, does that count? So it’s as good as it can get. It made about half a litre, if you’re planning to do it yourself, and I would recommend it, and want to be organised with containers. And if you’re wondering how it went down with the German billet, all I could get out of her was “Mmmmm, mmm, mhmmmhhmm!” Plus a request to have some for lunch tomorrow on a roll.

Passionfruit Icecream in the Thermomix

I have to go pick up the German billet in half an hour, and instead of trying to disguise the fact that the house looks like it’s been violently burgled I’m telling you about passionfruit ice cream. At least I’ve made her some Anzac biscuits, I’m pretty sure that’s what any German billet would expect upon arrival. Followed closely by a Vegemite sandwich and a ride on a kangaroo.

It wouldn’t have occurred to me to attempt to make ice cream Before the Thermomix. I couldn’t find a passionfruit ice cream recipe that removed my socks either so, as I’m a veteran of one ice cream production, I thought I’d make it up.

I didn’t want one with seeds in it, and I find the act of sieving passionfruit frustrating and disappointing. So I did something I’d worked out when making syrups, you boil the pulp with a bit of water and sugar. I find I extract more passionfruity goodness that way.

Take quite a lot of passionfruit. I had a net full, but then we ate some, so it ended up being eleven. Scrape the pulp into a small saucepan. Add one hundred grams of water and three hundred grams of sugar. After tasting the custard I thought that might be too sweet, but in the finished product it’s fine. You could probably get away with 250 grams.

20130501-145056.jpg
Put it over a small burner and bring to the boil, stirring to help dissolve the sugar. This took me about five minutes. Take it off the heat when it looks like it’s trying to escape.

20130501-145148.jpg
Insert the steamer basket into the Thermomix jug and tip in the syrup. Squash down the pulp with a teaspoon, you only want seeds left. Discard the pulp. Add to the jug three hundred grams of cream and two hundred grams of full cream milk. You could go all cream if you want it very rich. I also added a pinch of salt. Zap it on speed five for thirty seconds to mix. Reduce the speed to four and crack four eggs through the hole in the lid. A tip here: if you do get a little cocky and manage to drop half an eggshell through the hole too, you can stop the machine and retrieve the unbroken shell if you’re quick. Replace the measuring cup in the lid, set the temperature to ninety degrees and continue on speed four for five minutes. Pour the custard into a metal bowl and shove it in the freezer.

All the recipes I see suggest three to four hours in the freezer will do the trick, but not my freezer. More like overnight. Anyway, once it is frozen, and this could be days later, scoop it out of the bowl and back into the Thermomix. You can see why you need this step if you look carefully at this photo.

20130501-145957.jpg

See there’s a creamy lay on top and an icy layer underneath? That needs breaking up.

20130501-150041.jpg
General Thermomix icecream instructions now tell you to mix on speed nine for twenty seconds, then speed four for ten. You are going to need to poke it about with the spatula, it’s pretty stiff. I think just zap and poke and zap and poke until it looks entirely broken up. It will be about disgusting McDonalds icecream consistency at this point, so pour it back into the bowl and back it goes into the freezer.

20130501-150335.jpg
Should be ready for dessert. I’m going to be serving our billet for dinner that Australian classic, spag bol. Passionfruit ice cream should go nicely with it. I hope the kookaburras are back in the morning, that’s the kind of thing she would have signed up for.

Thermomix Caramel Icecream

“You know,” I said to the Horror from Outer Space as we sat companionably at our local, The Hungry Grasshopper. “I can make ice cream in the Thermomix”. “You should make caramel,” he said, looking up from his caramel milkshake. “Not long ago you could only get strawberry, vanilla and chocolate milk shakes. Caramel is making a comeback”.

Well, it is one of my favourite flavours too. I like to do my research first, and there seems to be a canonical caramel ice cream recipe for the Thermomix, the Salted Caramel Maple Syrup ice cream recipe. I had a big lurk in the forums, and there were opinions on the saltiness, the sweetness, the richness of this recipe. I took all of these into consideration and came up with the following.

First, you make the caramel. Put 250 grams of brown sugar into the Thermomix and zap it on speed 9 for thirty seconds. The recipe actually said raw sugar, but I didn’t have any. The forums also suggested rapadura, but I don’t know what the hell that is, but filed it away with aged rice as something to investigate for the future. Add 50 grams of maple syrup, 50 grams of unsalted sweet butter and two teaspoons of vanilla extract. I checked back to very original recipe and it said two teaspoons of vanilla bean paste, which is a bit more intense and I did happen to have it, so that went in. Put the Thermomix on Varoma temperature, whatever that is, and cook it on speed 1 for fifteen minutes.

Then you add either two teaspoons of sea salt if you do actually want it salty, or a couple of grinds of the salt grinder if you don’t really, or you don’t have an over salted palate. Have a guess which way I went. The recipe also suggests 500 grams of cream and 100 grams of milk. Looking at the number of forum comments suggesting it was a very rich recipe, and looking at the vanilla ice cream recipe in the included recipe book, I went 210 grams of cream and the rest full cream milk (ie 390 grams). Beat on speed five for thirty seconds.

With the beater still going, reduce it to speed four, then crack into the hole in the lid four eggs, one at a time. Once again taking the advice of the forums, cook at speed four at ninety degrees for six minutes. That’s your custard, pour it into a metal bowl and bung it into the freezer.

Apparently after about four hours it should be firming up. Mine is just going frosty about the outside, but once it’s relatively firm you spoon it back into the Thermomix and zap it on speed 9 for thirty seconds. The idea is to break up any ice crystals that are forming, a smooth mouth feel is caused by very tiny ice cream particles. I think you could probably repeat this step until you get a desirable consistency, but from what I can see once should be enough. Everyone has had a taste and it does seem that it may all be gone by breakfast time. The complexity of the flavour can be demonstrated by the husband’s question which was “does it have coffee in it?”. It doesn’t taste burnt, but the flavours have blended so that you can’t pick one out. I wouldn’t have picked that it had quite a bit of vanilla in it.

I am somewhat tempted to spoon it into the iceblock moulds while it’s still sludgy, but for this experimental run I may desist. It is taking longer to freeze than suggested, but the numerous tastes that have been taken have reduced the volume somewhat so that should speed it up. I like the adjustments I’ve made to the canonical recipe, my family’s palates aren’t ready for the extra salt and I think the full complement of cream would have been too rich. I am rather excited by the plethora of possibilities opening up now that I can make ice cream. Not that I eat ice cream, oh no.

20130419-212522.jpg

Rainbow Jelly Shots and What Happened to the Dorcas Squares

The things we do. The boys’ school normally just asks for cash, which is easy. Although the Horror’s mate told his mum that his class wanted to win the competition to buy goats for a village somewhere that was short of goats and could he have $250? She did beat him down to $5, but someone, somewhere is setting the bar too high. The girl’s school, on the other hand, seems to prefer your blood and sweat. Or perhaps that’s just how it filters through the Muffet.

Do you remember the Dorcas squares? Every girl in Year 7 was supposed to knit a couple to be later arranged into blankets for the deserving and frosty. Except that I knitted some for the Muffet because hers were a bit more Art Nouveau than a square. I assumed at the time that most squares had actually been composed by adults. Well, they asked for volunteers to assemble the blankets and guess who’s childlike faith in her mother’s abilities stuck me with a pile of ill-assorted squares? Go on, guess.

It turns out that some girls did knit the squares themselves. They were given a template to make it easy on the assemblers, but some were more free spirited than others. Muffet brought me home eighteen assorted “squares” to sew together and if you think about it for a bit, eighteen is not a square number. So I laid them out on the bed and eventually got them into a pattern that would give something with three straight sides anyway. I also invented a fabulous way to thread a wool needle that I’m sure has never ever been thought of before. You get a bit of cotton and loop it around the wool. Then you feed both ends of the cotton through the needle hole, then pull the doubled over wool up through the hole after it.

20130411-212206.jpg
So working sometimes with the ends that had been thoughtfully left on the squares and sometimes with a purple wool that clashed with all the other colours I managed to whipstitch it all together. I think it’s called whipstitch, it sounds good. It’s quite a small creation in the end.
20130411-212606.jpg
It has come out nice and flat (in that picture it wasn’t all stitched together yet) but it’s still a pretty rough looking thing. I’m not sure even the dogs would bother with it.
20130411-212719.jpg
I could be wrong. I wonder what it’s eventual fate will be?

And also due tomorrow is jelly for the jelly stall. Apparently the girls in each house run stalls from time to time and the Muffet and buddies have been assigned the jelly stall. Some show offs are doing jelly in orange halves. I resisted the urge to just hoik some gelatine leaves into a five litre tin of apple juice and laid in some plastic cups and a rainbow of Aeroplane Jelly packets.

It’s like feeding a baby, you do it every four hours. You lay out your twenty plastic cups. Put the packet of jelly crystals in a coffee plunger sitting on a scale. Weigh in 250 grams of boiling water. Stir. Weigh in 200 grams of cold water. Stir. Pour small amounts into plastic cups. Place cups on the shelf you’ve just cleaned off in the fridge. Repeat next time with a different colour. Sometimes the colours will blend into each other, but it gives a nice lava lamp effect.
20130411-213647.jpg
I’m just off to do the last layer and try to work out how she’s going to carry them safely to school. Lots of plastic bags I rather think. They’re going to sell them for a dollar each and while it didn’t actually cost me twenty dollars in goods and being a housewife my hourly labour rate is zero, it feels like they’re getting it cheap. Although from the Horror’s reaction upon eating a test sample, they will be very very enjoyable. And nobody forced me to do rainbow jelly, I just can’t help myself.